Vr Mapping |
ON-LINE REFERENCE DOCUMENTATION CARDINAL SYSTEMS, LLC |
Vr Touchscreen
Configuring VrOne/VrTwo for the Vr Touchscreen
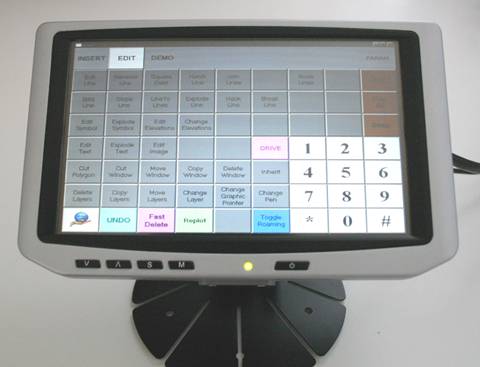
The Vr Touchscreen (original configuration)
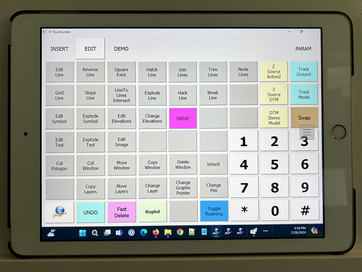
The Vr Touchscreen software is designed to be used with VrOne, VrTwo, and VrThree (VrLiDAR) and offers 567 user definable buttons on a touch screen device. Each button has the ability to output a Vr button number, Vr macro name and (or) start a Vr Function key. Any valid Vr key-in string may be placed on a Vr Touchscreen button. Programming the screen is as easy as touching the program button then the button to program. Each button may have its own text, color, text font and text. The 567 buttons are on 9 overlays of 63 buttons each.
The top row of the touch screen is the overlay row and is used to select one of nine menu overlays.
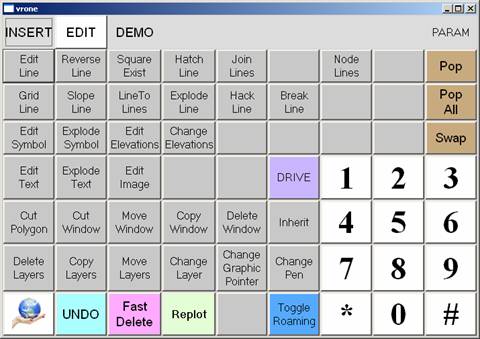
The Vr Touchscreen programmable push button interface
The Vr Toucscreen software is included with VrOne, VrTwo, and VrThree. This button dialog can be displayed on any Windows monitor. However it is designed to be used with a touch capable monitor. Following are several touchscreen monitors that can be used to display and work with the Vr Touchscreen dialog.
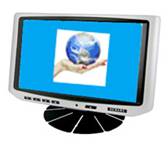
Xenarc 700TSV
Originally, the Vr Touchscreen button dialog used the Xenarc 700TSV as the additional touchscreen monitor. This small monitor normally required a second graphics card and is typically used today.
The Xenarc 700TSV
ViewSonic TD1655
These newer touchscreen monitors are easier to implement and configure and run as an additional monitor in Windows.
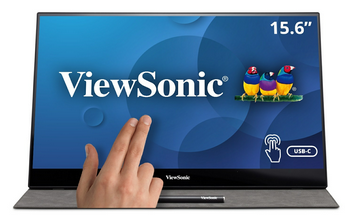
The ViewSonic TD1655
Apple iPad and Android Tablets
These tablets can be used as an additional touchscreen monitor using connection drivers such as Spacedesk (www.spacedesk.net).
VrTouchscreen displayed on the Apple iPad
Vr Touchscreen on the Samsung Android based tablet
The Touchscreen Parameter File
The parameter file name that contains the Vr Touchscreen button assignments and parameters is defined in the Vr Configuration program from the Configuration -> General pull-down. By default this file name is assigned \vr\hostdir\default.ts. If you program any buttons on the Vr Touchscreen you should not use this name as it will be overwritten on the next Vr software install.
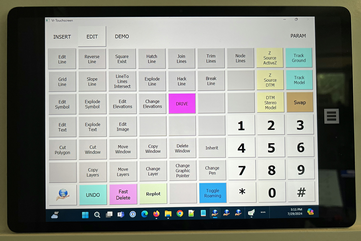
Entering Program Mode
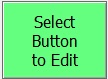
The lower left button on the Vr Touchscreen shows the Vr logo and is the program button. A single press of this button and it will change to green and display “Select Button to Edit”.

The Program Button
Programming a Button
At this time you may press any button to be programmed. First select the overlay to be edited by pressing one of the nine overlay buttons along the top row. A button to be programmed may be one of the 63 buttons on a single overlay or one of the nine overlay buttons along the top row. Pressing a non-overlay button will display the following dialog. Pressing an overlay button will display a similar dialog but without the “Command key-in” and “Apply to all menus?” fields.
The Edit Button
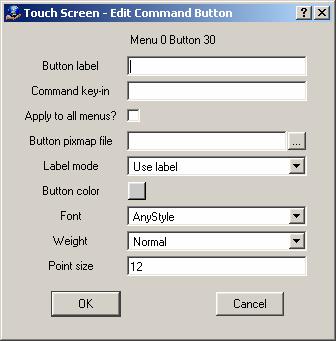
The Edit Command Dialog
Button label
The text label that will be displayed on the button face may be entered here. If the Label Model is set to Use label this text will be shown. Up to three rows of text may be entered depending on the size of the text. A blank in the text will indicate the next word will be displayed on the next line.
Command key-in
When this button is pressed this command string will be passed to VrOne. This line may contain any valid key-in, macro and (or) Function Key name. Multiple key-ins may be separated with a comma. VrOne 12-key button presses may be entered as b0-b11 where b0 is the snap on/off key and b10 is the * key and b11 is the # key.
Apply to all menus?
If this is checked then the button will be placed on all nine menu overlays.
Button pixmap file
An icon of picture may be placed on the button face instead of a text label. The Label mode must be set to Use pixmap to display a pixmap on the button face.
Label mode
Options are Use label, Use pixmap, or Use both. This parameter sets the display mode for the button face.
Button color
Shows the current button color and allows editing of the color by pressing the color picker button.
Font
This combo box allows the choosing of a text font for the text display on a button face. Options include Helvetica, Times, Courier and System.
Weight
This combo box allows the choosing of a text weight for the text display on a button face. Options include Light, Normal and Bold.
Point size
The size of the text label may be set here and is expressed as point size.
Button press sound for all keys
A wave (.wav) sound file may be played when a key is pressed. For a silent key press, leave this parameter blank.
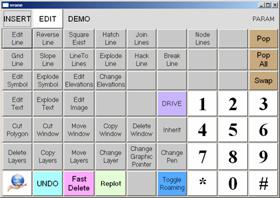
Copying a Button
Pressing the program button again will change its color to yellow and display “Select Button to Copy”. A source button may now be pressed and the display will change to “Select Target Button” at which time a target button may be pressed.
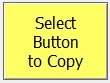
The Copy Button
Exiting Program Mode
Pressing the program button once again when “Select Button to Copy” is displayed will exit program mode and display the Vr logo on the button. Any buttons that were programmed are now ready for use.
The Program Button
Configuring VrOne/Two for the Vr Touchscreen
VrOne/VrTwo can be configured to start the Vr Touchscreen menu in the Vr Configuration program (VrCfig). Under the Configuration -> Keyport pulldown the Keyport Type may be set to Touch Screen.
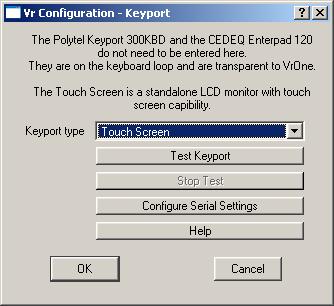
No other settings are required. When VrOne/VrTwo starts it will display the Vr Touchscreen menu on one of the screens. This is a Windows dialog box and may be dragged to a touchscreen monitor. Once there, it may be maximized and it will fill the entire touchscreen display. A restart of VrOne/VrTwo/VrThree will place the menu at its last position.
Original document: July 2007
Document revised: July 2024